This article is a guide for our customers with a Hustly WordPress hosting plan.
A significant benefit of choosing Hustly is that our setup includes a lightning fast global CDN by default. Our CDN service is provided via BunnyCDN.
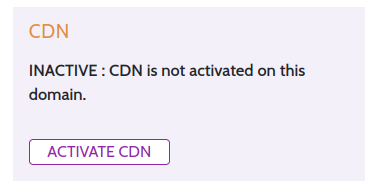
Every website or domain you add to your Hustly account, will have a CDN url allocated to it. To activate your CDN, simply scroll down to the CDN section. Click on “Activate CDN” to get your CDN pullzone’s URL.

Once your CDN is activated, a CDN url will be visible. You will now be able to use your CDN to accelerate your website.
Using the CDN with your website
There are a few ways to use your CDN url with your website:
- Using the official BunnyCDN plugin: Simply install the plugin and paste the URL in the plugin. The plugin will cache and serve your static assets via the CDN automatically. If you are using the Hustly Nginx cache, we recommend using the default BunnyCDN plugin.
- Using a third party caching plugin: Most 3rd party caching plugins such as WP Rocket, W3 Total cache and others, will have a field for your CDN pullzone’s URL. Simple paste the URL there, and your CDN will be activated on your website.
Clearing your CDN Cache
As a website administrator, you will often need to purge your cache and CDN in order to see the latest changes on your website. Your cache for your CDN can be cleared from your Hustly website management app. Simply login to your account, select your domain, scroll down to the CDN section and select “Clear Cache”.
We hope you found this short guide useful. There are many ways in which you can combine and use your CDN with third party plugins. Please feel free to reach out to support if there is a combination you would want to test, or it is not working.
Please leave us your feedback or questions in the comments section below.


