There are many benefits of using DNS services such as Cloudflare. To read about the benefits of using Cloudflare for your website in greater details, please read the key benefits of using Cloudflare or checkout the Cloudflare homepage to learn more about their features.
Please note that updating your Domain’s DNS and SSL settings will lead to your domain becoming unavailable temporarily.
If you are a Hustly customer and need assistance in making these changes, please create a support ticket to have your domains setup by us at no extra cost.
Before you read this article, we assume that you have read and completed setting up the following:
- Creating and setting up your Hustly hosting account
- How to login to your hosting server’s admin panel
Before you start – set up your Cloudflare account
You will need to have a Cloudflare account at minimum. The free tier of Cloudlare is usually enough for small websites. Once you have created a Cloudflare account, you will also need to add your domain name to Cloudflare.
Finally, please ensure that your domain is set to use your Cloudflare nameservers. This setting is usually configured with your domain registrar.
Configuring your DNS Records and SSL
Once you have added your domain to Cloudflare, it is time to update its DNS records, so Cloudflare can point your domain to your Hustly hosting server.
Step 1: Update your domain’s DNS records in Cloudflare.
You will need to add 2 records to Cloudflare:
Type: A
Name: @
IPv4 address or Host: IP Address for your Hustly server (Read this article to see how to find your server’s IP address).
Please ensure that there are no additional A or AAAA records pointing to the @ of your domain.
(ii). A CNAME record for the www subdomain:
Type: CNAME
Name: www
Target / Destination: yourdomainname.com
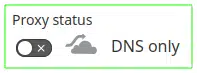
At this point, it is also advisable to use Cloudflare for DNS only, and disable the proxy mode, as this can sometimes cause issues with the SSL installation process. At the end of SSL installation (Step 3), you can re-enable the proxy mode in Cloudflare (recommended).
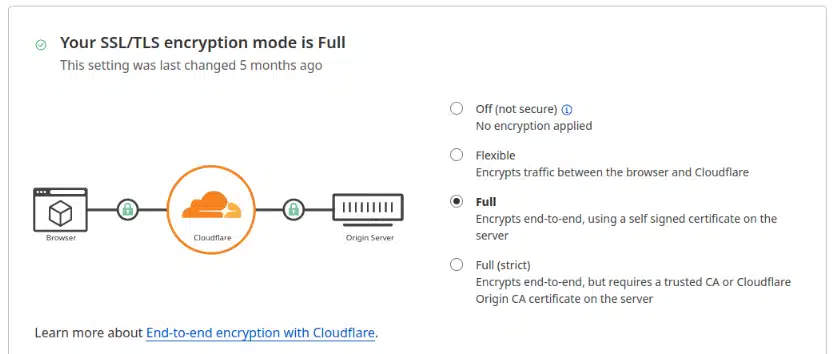
Step 2: Configure Cloudflare’s SSL Mode
In Cloudflare, in the main side menu, navigate to the SSL/TLS section and go to Overview. Ensure SSL/TLS Settings are set to “Full”.

In the dialog that appears, ensure “Full” is selected and not “Full Strict”
Once you have updated your DNS records, please wait for some time for the DNS changes to propagate. It usually takes anywhere between a few minutes to up to 48 hours for DNS settings to propagate. Our datacenter DNSs sync regularly with Cloudflare, so this should take closer to a few minutes. We would recommend waiting about 15 minutes before proceeding to Step 3.
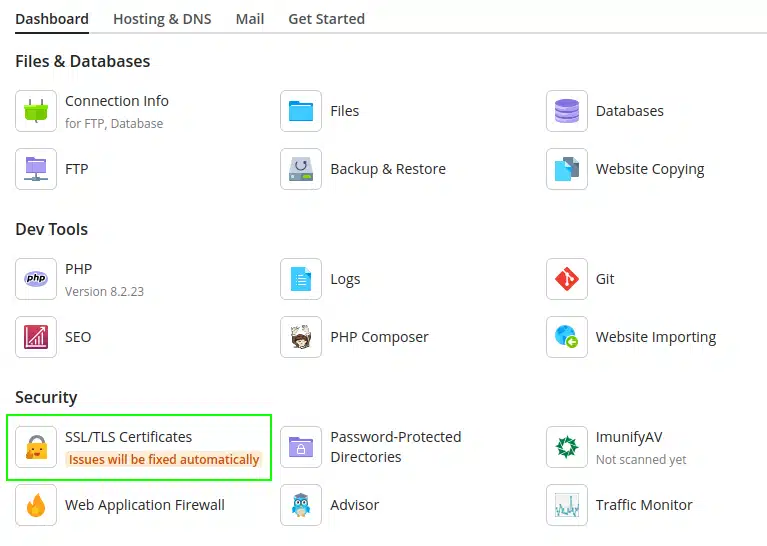
Step 3: Install your SSL certificate
Login to your hosting admin panel (Plesk). Find and navigate to the SSL/TLS Certificates section, in the Dashboard tab for your domain.
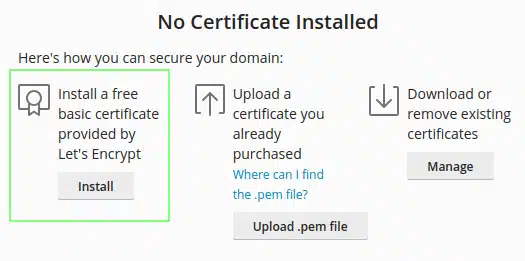
This section will show you the available options to install an SSL certificate. Choose the first Let’s Encrypt option.
In the installation options, please disable the “Secure the wildcard domain” option. If you want the “wildcard” option enabled, you will need to add an additional acme-challenge record to your Cloudflare DNS settings. The panel will prompt you with the records to add, during the installation process. In most cases, it is okay to keep this option disabled. The settings shown in the image below, should work for most cases.
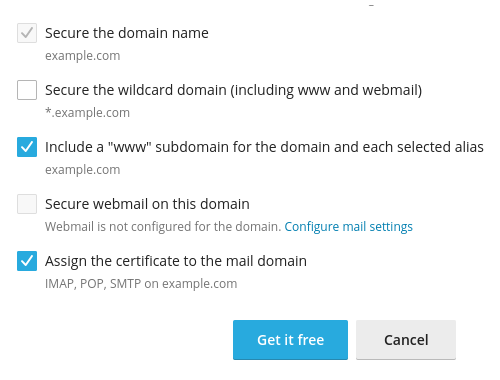
Proceed to install the SSL Certificate and let the installation finish.
Once the SSL certificate is installed, please enable Cloudflare’s proxy by editing the DNS records you have added in Step 1.
Please note that sometimes errors can happen during the installation process, so please wait for some time and try again, as delays in DNS propagation can sometimes cause unknown errors.
That’s it!
The entire process should be error free, if you have followed all the steps.
As you are using Cloudflare, We recommend using the WP Fastest Cache plugin [link], as it has in-built integration with Cloudflare and is a significant performance booster. We have tested various combinations of WordPress cache and CDNs, and on our setup, this combination works great for most users.
We hope you found this guide useful. If you have any questions, comments or feedback, please feel free to share your thoughts in the comments section below.