This article is a guide for customers on Hustly managed WordPress hosting packages, who are using our default performance setup. Users with WordPress setups similar to ours will find this guide useful as well.
As a website owner, creating a full backup of your website is a critical security step. This simple guide will help you create a full backup of your WordPress website. This backup can be used to restore the last working version of your website.
Luckily, if you are on a Hustly managed WordPress hosting plan,we would have pre-configured your WordPress setup for easy backups. You can easily schedule automatic backups of your entire WordPress website, to the cloud storage provider of your choice (e.g. Google Drive, Dropbox, OneDrive, Amazon S3 and more).
If you are an existing Hustly customer and unable to do this backup yourself, please email support to have your auto backups setup by us at no extra cost.
There are 2 methods to back-up your website, and both have pros and cons. We would recommend using both the methods for complete peace of mind.
- Method 1: Using your Hustly hosting admin panel
- Method 2: Using a third party plugin
Regardless of the method you choose, it is important to periodically check if the backups are being created as you have specified, are stored remotely, and can be restored. To verify that the backups can be restored, we recommend creating a staging website (Read how to create and manage your staging website with Hustly.)
Method 1: Using your Hustly hosting admin panel
The pros of this method is that this option is included in your Hustly hosting panel. However, there is a con that the backups are managed by the servers, and if the server is ever lost, you will lose your backup as well. However, the risk of this is significantly reduced, if you use an external cloud storage provider to store your backups. However, this still doesn’t protect against the backup process failing for reasons beyond your or our control.
Launching the Backup Manager
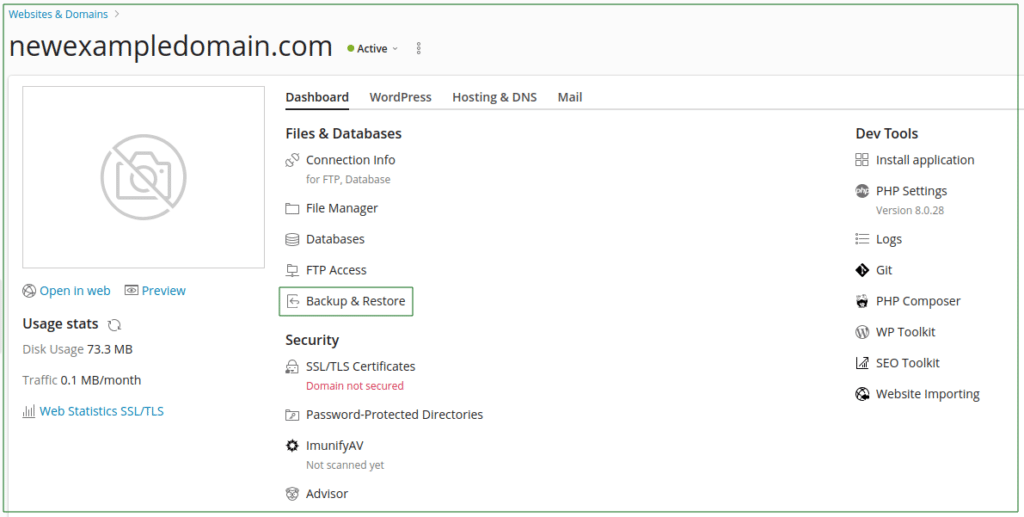
In order to back up your website with this method, you will need to be logged into your hosting admin panel. Navigate to your desired domain, and navigate to the Dashboard tab. Find the “Backup/Restore” option as highlighted below, and click on it. This would launch the backup manager.
The backup manager would show you your existing backups. In our case, all the backups are the scheduled automatic daily backups, as shown below. The scheduled automatic backups are carried out by the Hustly system, and it is a benefit of using our service. However, it is important to regularly confirm that the backup process is not failing for your website – as it can happen if there are other errors on your website or hosting configuration.
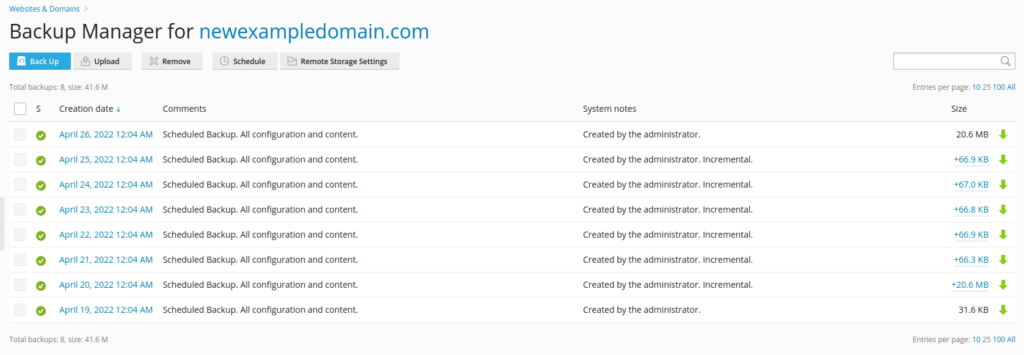
Creating a manual backup
Click on Back Up to create a back-up. Your existing backups will also be shown in this dialog.
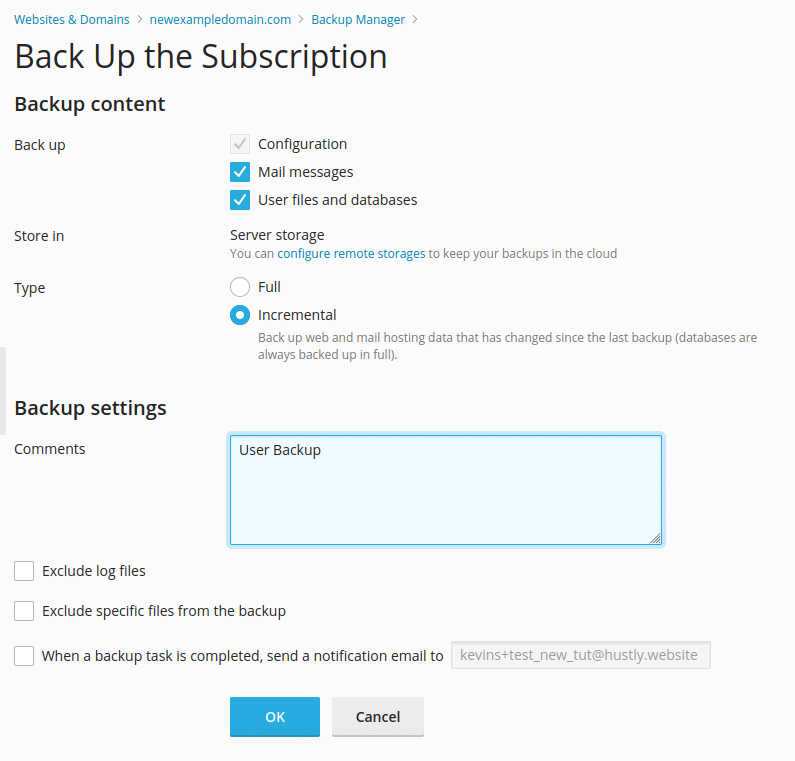
Click on Back Up to create a new manual backup. You can either create a “Full” or an “Incremental” backup. It is important to note that this backup would backup your entire server for this particular location. If you have additional locations, you must create a manual backup by logging into the respective server’s admin panel.
Once you start the manual backup process, it would take a short time to finish (depending on the size of your website), and the backup would appear in the list of backups in your Backup Manager.
Restoring a backup
To restore a backup, view the backup’s content by clicking on the backup you want to restore from the list of backups in your Backup Manager. A dialog will appear showing the selected backup’s content in detail.
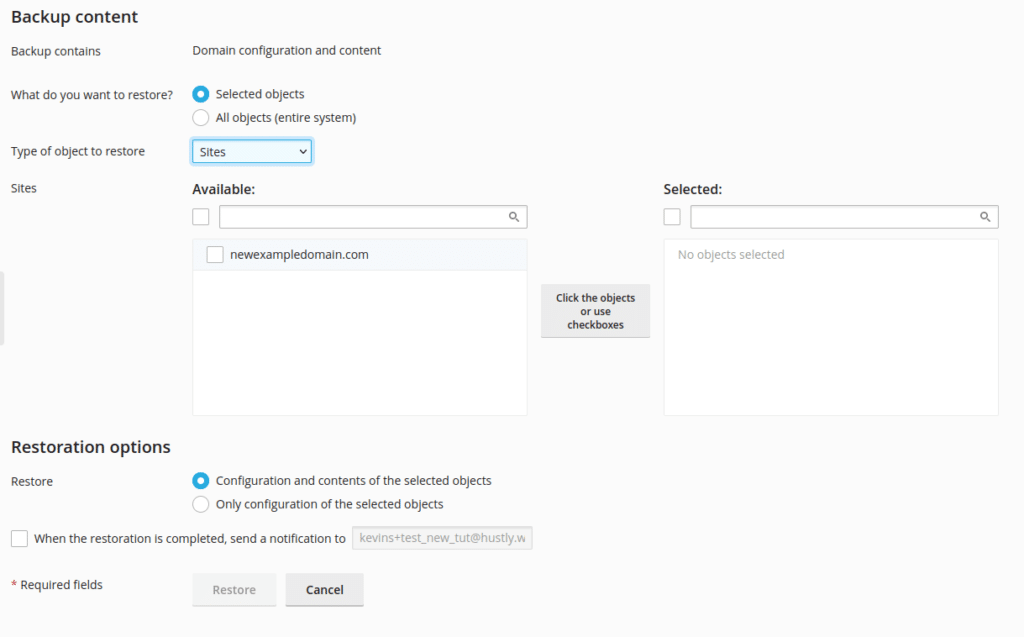
Please note that each backup contains a backup of all your data on the specific server location. Select the content of the backup you wish to restore. You can restore your entire account, individual databases, files or individual websites by selecting the “Type of object to restore”. To restore individual websites, you must select the individual website from the list after selecting the “Type of object to restore” as “Sites”.
Begin the restore process by clicking “Restore” once you have filled out all the details. Wait for the restore process to finish, and your website would be restored to the previous backup state you have chosen.
Backing up to remote cloud storage
Your automated backups are stored on the server itself, so there is always a risk of losing them if the entire server gets corrupted. The number of backups you can store is also limited by the size of your website and the plan you are subscribed to. The best and recommended option is to automatically (and manually when needed) store your backups on a remote cloud storage.
The in-built backup and restore system in the Plesk hosting admin panel will let you save these automated backups in a remote cloud storage service of your choice (such as Google Drive, Dropbox or Amazon S3). In order to start this operation, select the Remote Storage Settings option on the Backup Manager.
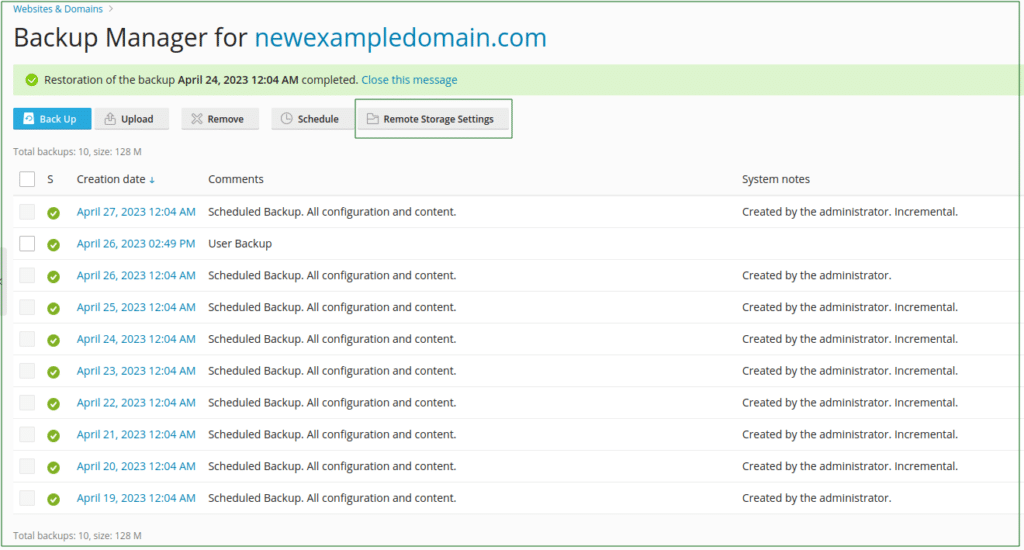
Select the Remote Storage Settings option on the Backup ManagerSelect the cloud storage provider of your choice, and finish the configuration for the respective provider. You can choose between Dropbox, Google Drive, Microsoft OneDrive or AmazonS3. You can also choose FTP(S) and SFTP to save these backups remotely to other providers, or your own servers.

It is important to periodically check if the backups are functioning.
Method 2: Using an external plugin
The pros of this method is that this option relies on a third party plugin that can be installed on any WordPress website, from which you can restore your existing website. This method is great if you ever want to switch to another hosting provider who does not use the WP-Toolkit system used by popular hosting admin panels.
In order to backup your website with this method, you need to be logged into your WordPress website’s dashboard as an administrator. Once logged in, go to the installed plugins section of your WordPress dashboard, and find the plugin “UpdraftPlus – Backup/Restore”. Once you find the plugin, click on the “Settings” links adjacent to it.
Alternatively, select Settings > UpdraftPlus Backups in your WordPress menu.
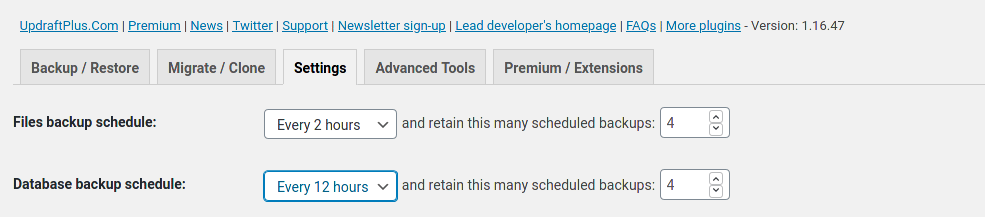
Once you are in the plugin’s menu, select the Settings tab at the top.
You will want to schedule both your files and database, and back them up securely to the cloud. Please, always, keep secure local backups of your critical data.
Step 1: Select your backup schedule
For most websites, we recommend a 12 hour backup schedule. If your website is busy or frequently updated, you may choose a shorter schedule.

Please ensure you select a backup schedule for both your (i) files and your (ii) database.
Step 2: Select cloud storage location for your backups
Select where you will like your backups to be stored, and complete the necessary steps by connecting your cloud storage account with the UpdraftPlus plugin.
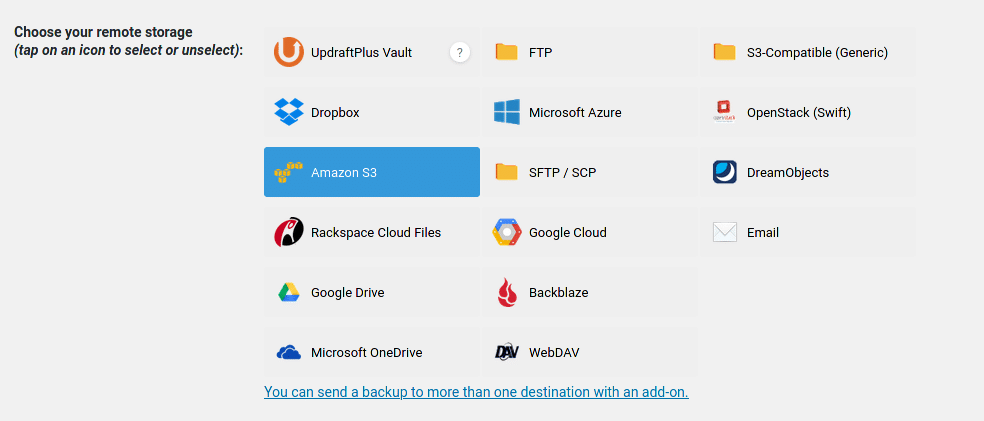
Please make sure to press the “Save Changes” button at the end.
Once you have set up your storage location, the plugin will automatically create your first backup.
A more detailed guide on how to use the UpdraftPlus plugin can be found on their official website here.
We hope you found this guide useful and are on your way to backing up your website. Please let us know what you think in the comments section below.