You are reading Part 3 of our Hustly email service guide series. Choose another guide below at any time.
| Guide | Topic |
|---|---|
| Part 1 | How to Enable Your Hustly Email Inbox Service |
| Part 2 | How to Configure DNS Records for Your Hustly Email Inbox Service |
| Part 3 | How to Create and Manage Your Hustly Email Inboxes (current guide) |
| Part 4 | How to configure Email Clients to access your Hustly Email. |
| Part 5 | Advanced Email Options - Login to your Hustly email admin panel. |
| Part 6 | How to set up Email Forwarding with your Hustly Email service. |
| Part 7 | How to view email logs in Hustly email admin panel. |
| Part 8 | How to migrate and import your existing emails into your Hustly email service |
Once your Hustly email service is active, you can create and manage email inboxes from the Email section of your Hustly account. The email administration panel also offers advanced account controls.
Before you start
First enable the email service and configure your email DNS records. If you have existing email inboxes, you might wish to migrate those first: read our email migration guide.
Create an email inbox from your Hustly account
Sign in to the Hustly app, open the Email section and select the email domain where you want the new mailbox.
Click the “+ ADD NEW EMAIL” buttom to create a new email inbox.
You will notice that an email address is automatically created. This inbox is the “admin email” for the domain and and cannot be deleted. However, you are not required to use it. If not used, the admin email account will not consume any mail resources.
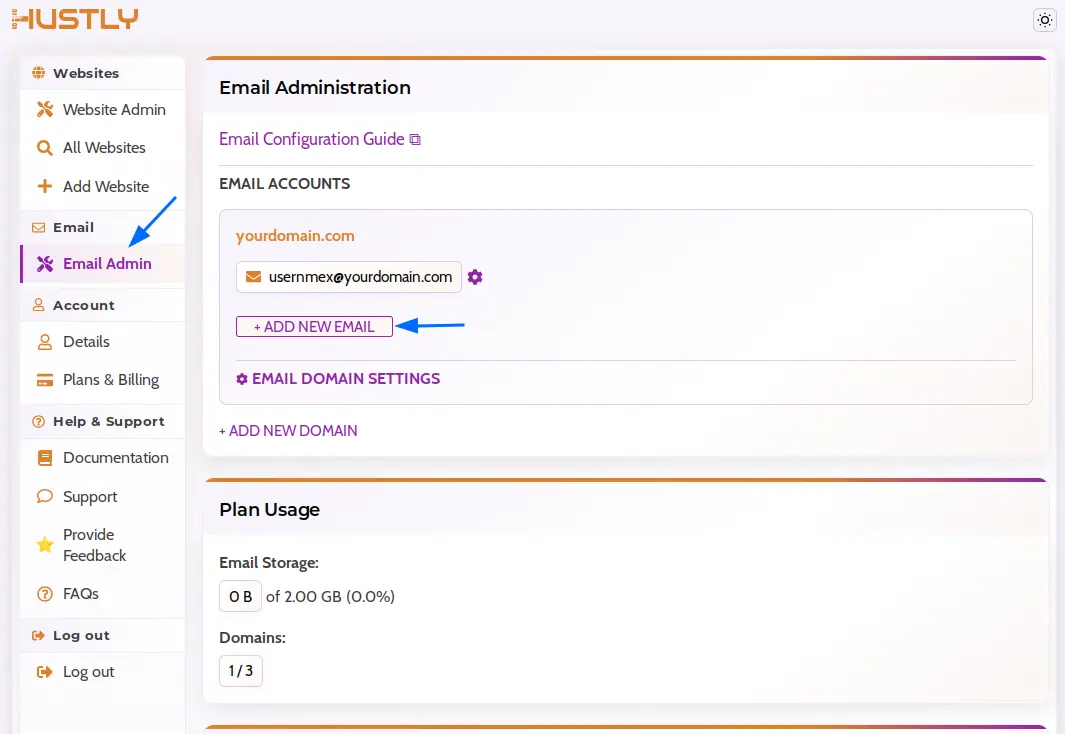
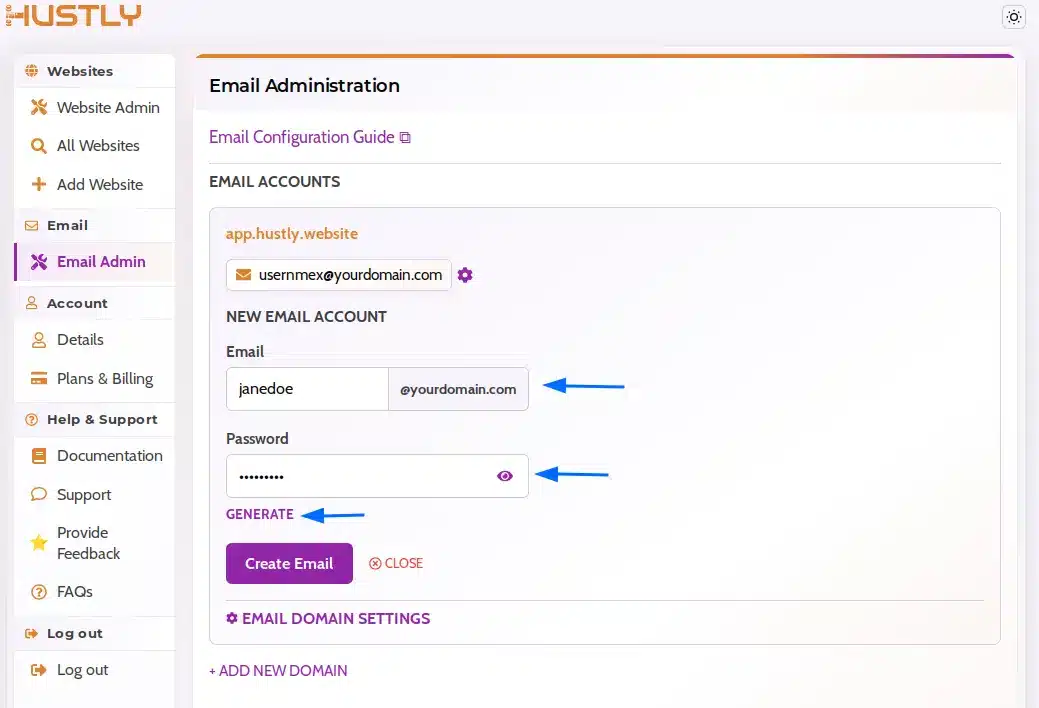
Fill in the required details like your email address and password and proceed to create the inbox. Save the mailbox password securely. You will need the full email address and password to sign in to webmail or configure an email client.
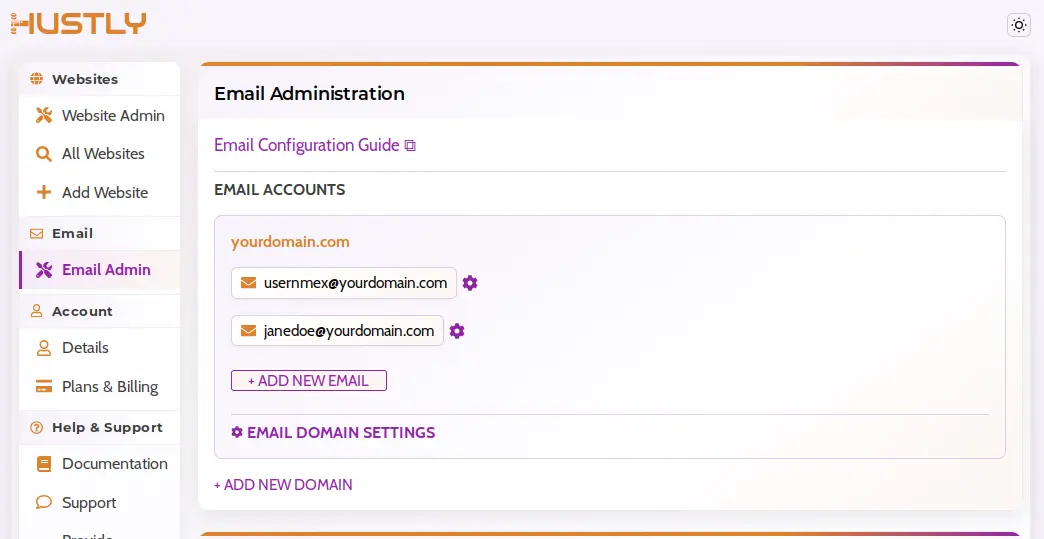
Once your new inbox is created, return to the Email section to view your existing inboxes.
Access your email using webmail
The easiest way to check your emails is using the browser based webmail client (Roundcube). Scroll down on the Email Admin page, to the Webmail section. Click on the webmail URL or copy/paste it into a new browser window. Once the webmail portal loads, login to check your emails, using your full email address including the domain name, and your password.

Manage existing inboxes
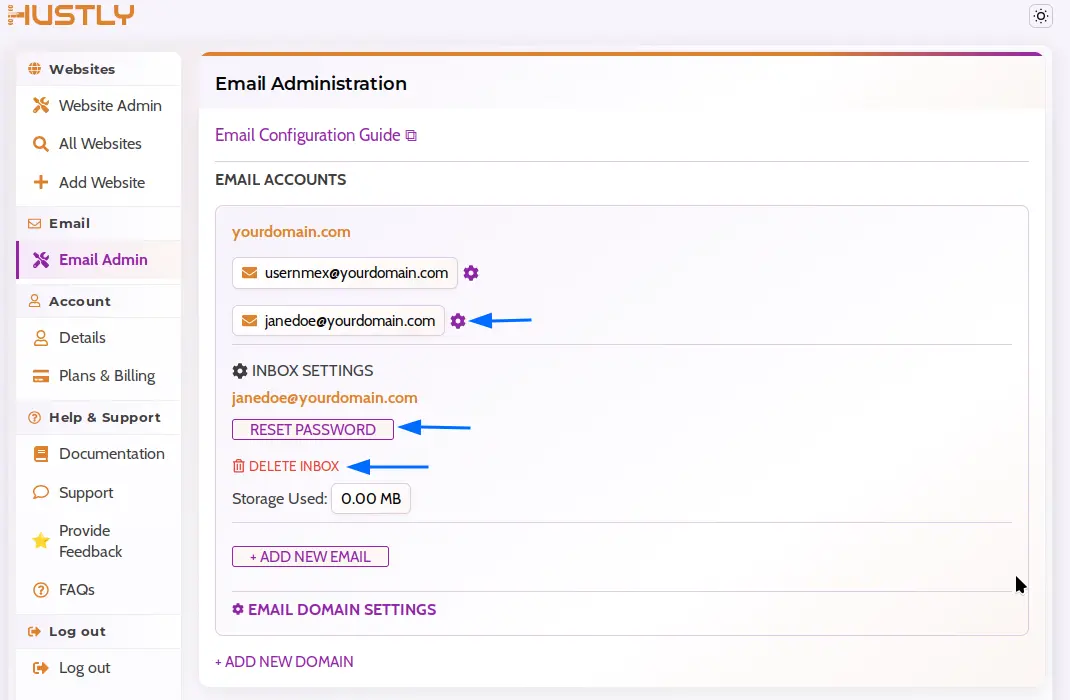
Each of your email inboxes can be managed by clicking on the email address or the adjacent settings icon. Click on the email address to see additional options. Specifically, options to “RESET PASSWORD”, “DELETE” the inbox, and the total “Storage Used” by the email address.
Add another email domain
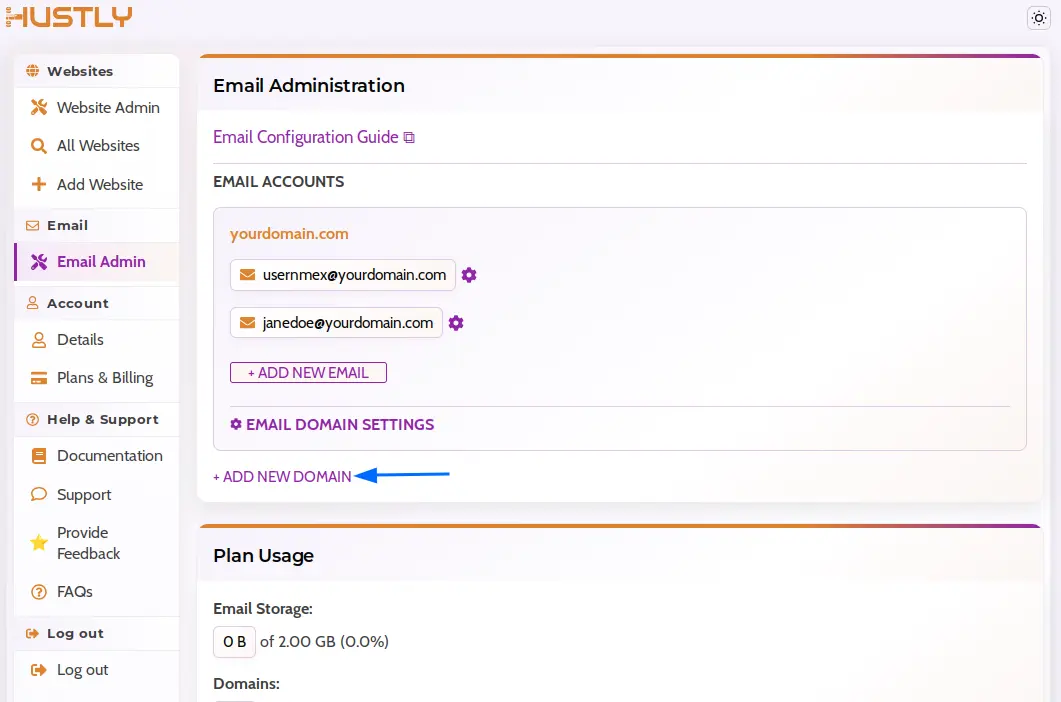
You can add additional email domains to your service, subject to your plan limits. Select the “+ADD NEW DOMAIN” option to add a new email domain to your account.
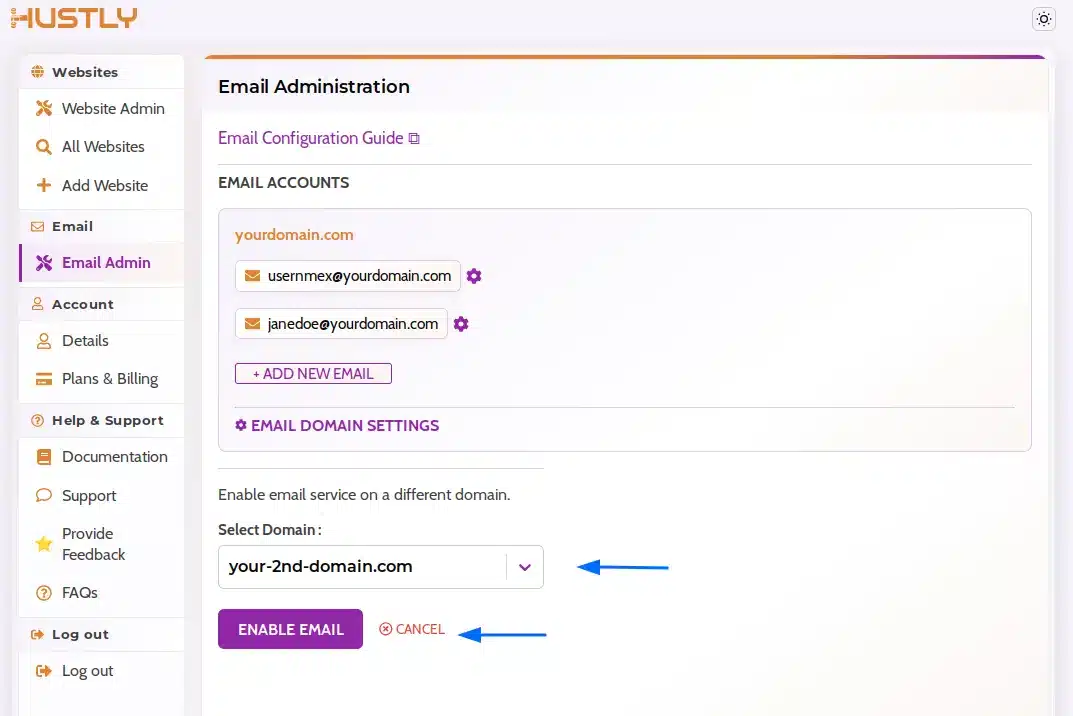
Select the domain from your list of hosted domains. The domain must be added to your hosting account, before you can enable the Email Inbox service on it.
When an additional domain is added, you will be prompted to verify ownership by adding the displayed DNS TXT record to your domain’s DNS records. This step is added to prevent spam and abuse of our email service.
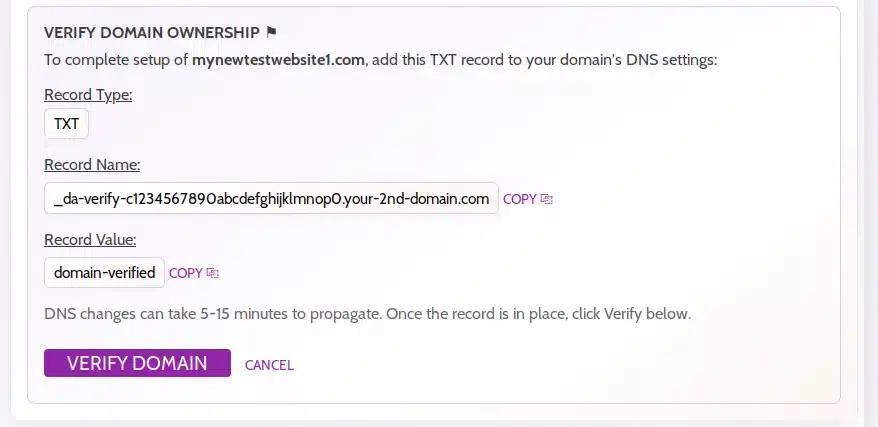
If your Nameservers are managed by Hustly, the verification record will be automatically added to your Hustly DNS settings. Please wait about 5-15 minutes, and attempt to add the domain again. Click on “VERIFY DOMAIN”, and the new email domain should get added.
If the domain is not added and you are prompted to verify it again, please double-check your DNS records to confirm that the verification record has been added correctly.Once confirmed, click “VERIFY DOMAIN” to attempt verification again. DNS propagation can sometimes take longer than expected, so in rare cases, you may need to wait a while and try again.
Note: DNS configuration for additional email domains
Once your email domain has been added, you will need to configure the required DNS records to ensure reliable email sending and receiving.
If your nameservers are managed by Hustly, these records will be configured automatically.
If your DNS is managed elsewhere, you will need to manually configure the required email DNS records for your new domain. Please refer to our Email DNS Configuration Guide for instructions.
Continue with the next guide
Previous: How to Configure DNS Records for Your Hustly Email Inbox Service
Next: How to configure Email Clients to access your Hustly Email.
Moving existing mailboxes? Read our email migration guide.
We hope you found this guide useful. If you need assistance setting up your Hustly email service, please create a support ticket in your Hustly account.