You are reading Part 1 of our Hustly email service guide series. Choose another guide below at any time.
| Guide | Topic |
|---|---|
| Part 1 | How to Enable Your Hustly Email Inbox Service (current guide) |
| Part 2 | How to Configure DNS Records for Your Hustly Email Inbox Service |
| Part 3 | How to Create and Manage Your Hustly Email Inboxes |
| Part 4 | How to configure Email Clients to access your Hustly Email. |
| Part 5 | Advanced Email Options - Login to your Hustly email admin panel. |
| Part 6 | How to set up Email Forwarding with your Hustly Email service. |
| Part 7 | How to view email logs in Hustly email admin panel. |
| Part 8 | How to migrate and import your existing emails into your Hustly email service |
The Hustly email service allows you to create email accounts and addresses, activate the email service on your domains and use the email service as an SMTP service or for forwarding. This guide covers activating the service and connecting your first email domain.
If you are a Hustly customer and need assistance in making these changes, please create a support ticket to have your domains set up by us at no extra cost.
If you already have mailboxes with another provider, you can also use our email migration guide to plan your move.
Before you start
Before you read this article, we assume that you have read and completed setting up the following:
You must add at least one domain to your Hustly hosting account before you can activate the email service.
Connect your first email domain
To activate the new email service, please login to your Hustly account and navigate to the “Email Admin” section from the main menu. On mobile and smaller devices, this section appears under the top right hamburger menu
You will be prompted to set up your mail account. Please select one of your domain names as the primary domain name associated with your mail account. You can add additional domains later.
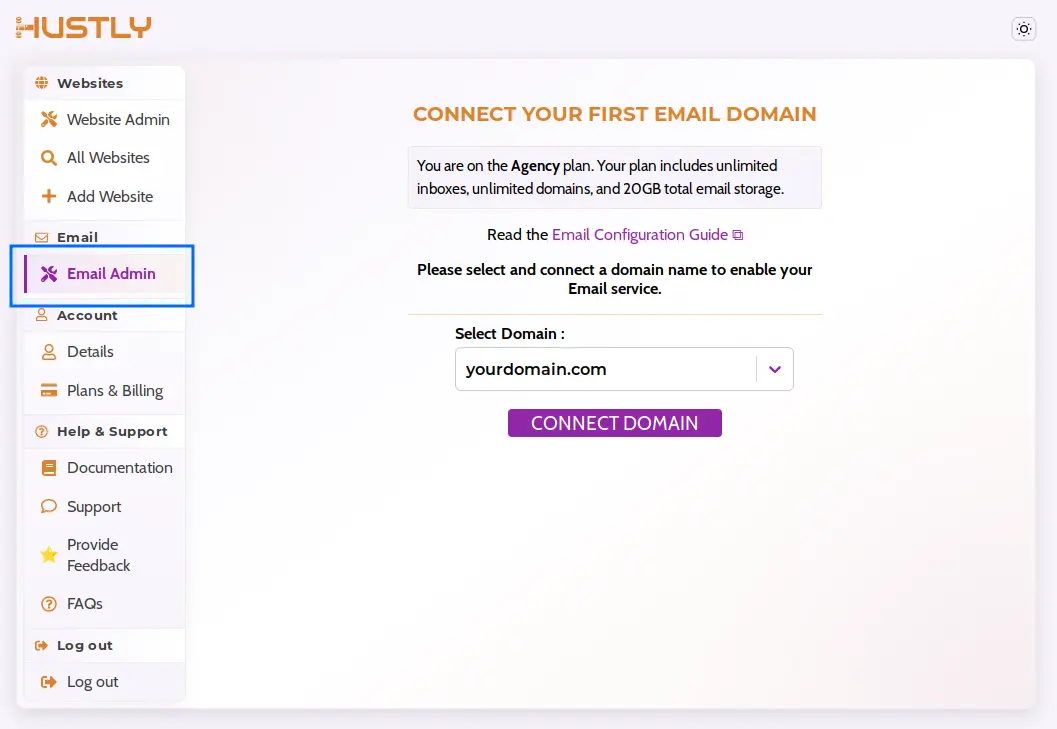
Click on “CONNECT DOMAIN” to connect your first email domain. This will activate your Hustly email service, with the selected domain becoming the primary domain associated with your email account. Please note that temporary domain names issued by Hustly cannot be used as email domains.
Once your domain is connected, your email service will be ready to use. You can now create and manage email inboxes, add more email domains, and access your email through webmail or your preferred email client. Continue with the remaining guides in this series to learn how to configure your domain’s DNS records, manage your inboxes, set up email clients, and access advanced email administration features.
Your first email domain is now added. Before you use email with this domain, follow Part 2: Configure your email DNS records. You can then create and manage your inboxes.
Continue with the next guide
Next: How to Configure DNS Records for Your Hustly Email Inbox Service
Moving existing mailboxes? Read our email migration guide.
We hope you found this guide useful. If you need assistance setting up your Hustly email service, please create a support ticket in your Hustly account.