You are reading Part 5 of our Hustly email service guide series. Choose another guide below at any time.
| Guide | Topic |
|---|---|
| Part 1 | How to Enable Your Hustly Email Inbox Service |
| Part 2 | How to Configure DNS Records for Your Hustly Email Inbox Service |
| Part 3 | How to Create and Manage Your Hustly Email Inboxes |
| Part 4 | How to configure Email Clients to access your Hustly Email. |
| Part 5 | Advanced Email Options - Login to your Hustly email admin panel. (current guide) |
| Part 6 | How to set up Email Forwarding with your Hustly Email service. |
| Part 7 | How to view email logs in Hustly email admin panel. |
| Part 8 | How to migrate and import your existing emails into your Hustly email service |
The Hustly Email Admin Panel gives you advanced controls for email accounts, domains and other mail settings. This guide explains how to access it using the credentials supplied through your Hustly account.
Before you start
Complete Part 1: Enable your Hustly email inbox service and connect your first email domain.
Find the Email Admin Panel URL
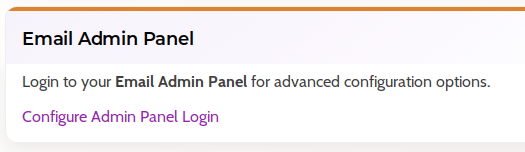
In your Hustly account, open the Email section and find the “EMAIL ADMIN PANEL URL” section. The Email Administration Panel allows you to create and manage your email accounts and email domains.
Generate or reset your admin password
To access the Email Admin Panel, you will first need to generate your login credentials. Please navigate to the “EMAIL ADMIN PANEL URL” section, and click on “Reset Password”.
Please save the generated password and set this as your password by checking the confirmation box and clicking “Set New Password”. Please note that you can reset this password as many times as you like.

Save this password securely. It is separate from the passwords used to sign in to individual email inboxes.
Log in and find advanced controls
With these credentials (username and password), you will be able to login to your Email Admin Panel using the Email Admin Panel URL shown in your Hustly account.
Advanced mailbox management in the email admin panel
The Email Admin Panel provides an alternative way to manage individual inboxes. After logging in to your Email Admin Panel, navigate to E-mail Accounts in the E-mail manager section.

Click “Create Account” to add an inbox.

You will be prompted to enter your email address, set a password and set the storage quota for the inbox. Please save the password you generate here. In case you forget this password, the email admin panel will also let you reset your email account passwords as many times as you like.

From here you can manage email inboxes and domains (Part 3), configure email forwarding and investigate email logs.
Continue with the next guide
Previous: How to configure Email Clients to access your Hustly Email.
Next: How to set up Email Forwarding with your Hustly Email service.
Moving existing mailboxes? Read our email migration guide.
We hope you found this guide useful. If you need assistance setting up your Hustly email service, please create a support ticket in your Hustly account.