This article is a guide for customers on Hustly WordPress hosting plans, who are using our default setup. Users with WordPress setups similar to ours will find this guide useful as well.
There are 3 ways in which you can migrate your WordPress website to Hustly. These are:
- Using the in-built website import feature in the hosting panel (Slow)
- Using a plugin (Fast)
- Manually importing your WordPress website (For advanced users. Fast and fool proof.)
Before you start the migration process, make sure to back up all your website files and data.
Method 1: Migrating a WordPress website to Hustly using the Plesk hosting panel
This method utilized an FTP connection to import an existing WordPress website to Hustly. To proceed with this method, you must have access to the source website via FTP. While this process is easy, it might also be the slowest, since file transfers over FTP can take a long time.
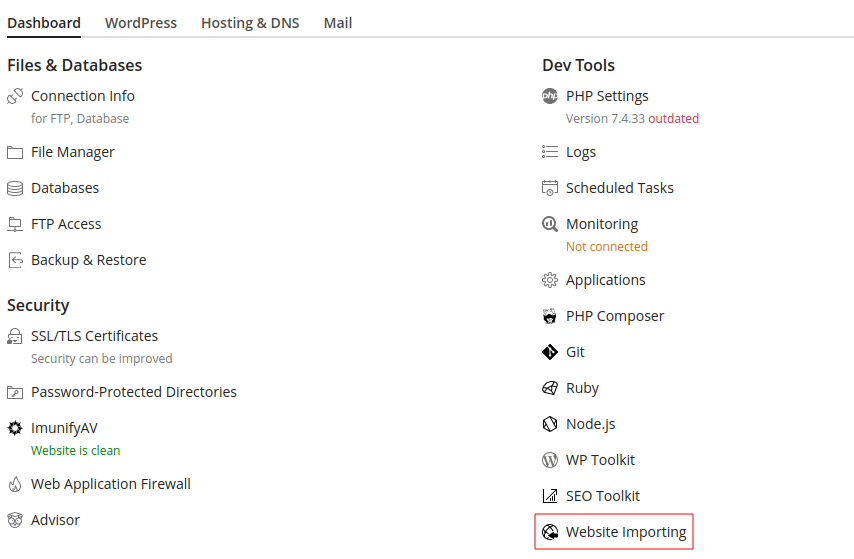
Login to your Plesk hosting panel and select the target domain you want to migrate your website to. Select the “Website Importing” option.
You will be taken to the next dialogue, where you will be asked to enter your Ftp credentials. Switch to the “Advanced” mode, and enter your details as shown below.
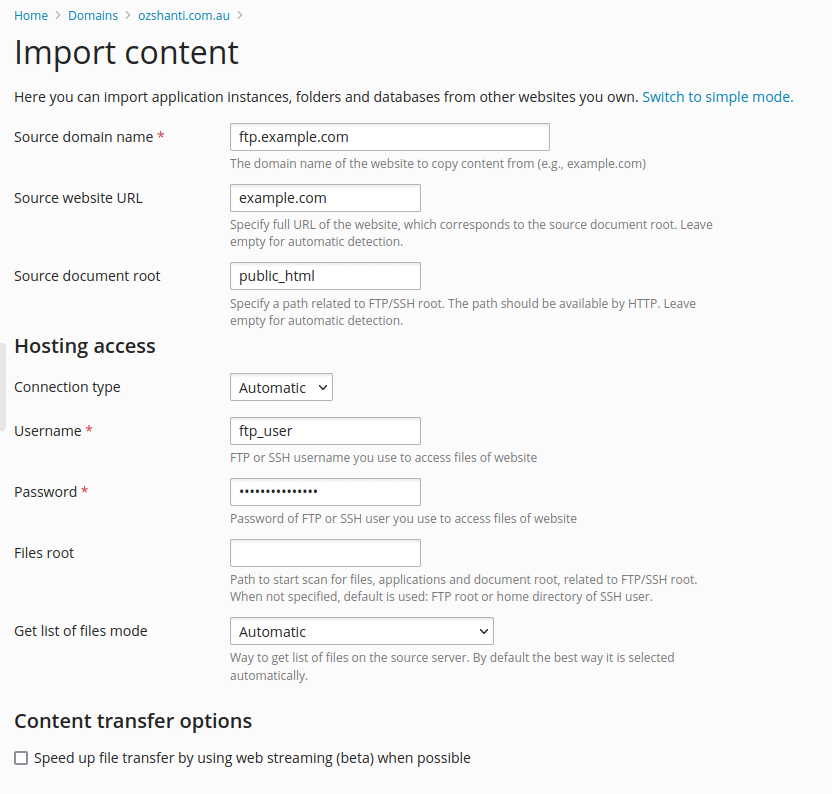
Fill out the details as shown above. Please ensure that you enter the correct “Source document root” directory. The website importer will automatically find all installed websites on the target site, and allow you to select the website you want to import. For a more detailed guide about the settings, check the official Plesk documentation here.
Wait for the import process to finish. Once the process has finished, please configure your DNS settings to point your domain name to your Hustly server.
Method 2: Migrating a WordPress website to Hustly using a plugin
An easy and quick way to migrate your WordPress website to Hustly is using a third party plugin. We recommend using the WordPress plugin UpdraftPlus. The plugin allows you to create a backup of your existing website. The website migration is achieved via restoring the backup created by UpdraftPlus on the source website, on a fresh WordPress installation (the target website). The free version of the plugin is adequate to complete the migration process.
Since this method requires the target website to have WordPress installed, since you would need access to the WordPress admin to install plugins. Thus, to minimize downtime during migration using this method, it is recommended to use a subdomain (such as ‘stage.example.com’). This can be achieved by creating an additional website from your Plesk hosting panel and installing a fresh instance of WordPress on it. You will also need to ensure that you have configured your DNS settings to point your subdomain (such as ‘stage.example.com’) to your Hustly server.
The steps to complete the migration process via this method would involve:
- Installing UpdraftPlus on the source website and creating a backup.
- Downloading all the backup files and save them in a secure place.
- Setup the target website by installing a fresh WordPress instance on your Hustly setup. If you want to minimize downtime, it is recommended to use a subdomain to carry out this process (such as ‘stage.example.com’). Ensure that you have configured your DNS so your fresh WordPress installation is accessible.
- Install the UpdraftPlus plugin on the target website.
- Select the option to restore from backup, and upload your downloaded backup files from step 2.
- Wait for the restore process to complete.
- Once the restore process is complete, change your website’s domain name in the Plesk hosting panel to your desired domain name (‘example.com’)
Once the process has finished, please configure your DNS settings to point your domain name to your Hustly server.
Method 3: Manually migrating a WordPress website to Hustly using a plugin
This method involves manually copying over your WordPress files to a Hustly hosting space (typically a new domain).
Step 1: Copy your WordPress files
The copying of files can be done via thw browser based File manager in your Admin Portal or FTP. FTP credentials for your Hustly websites are found in the individual hosting panels. Please refer to our detailed guide on managing your files via File manager or FTP with Hustly.
Step 2: Copy your database
The second step involves copying your database from your source website to Hustly. An easy way to achieve this is via the built-in phpmyadmin tool. This step involves exporting your database from the source host, via a tool such as the phpmyadmin tool. Thereafter, you create a database in your Hustly admin panel using the phpmyadmin tool, and then import the tables from the file you exported earlier.
Step 3: Update wp-config.php
Update the “wp-config.php” file to include the new database credentials.
Step 4: Point your domain name to your new hosting server
The final step would be to update your DNS records to point to your new hosting server.
Congratulations! You should now have completed your WordPress migration.
Website migration is often complicated, and a lot of proven methods can often fail. If you are unable to complete this process yourself and are a Hustly customer, please reach out to our support and we will complete the migration for you.
We hope you found this guide useful. Please let us know what you think in the comments section below.