This article is a guide for our customers with a Hustly WordPress hosting plan.
A significant benefit of choosing Hustly is that our setup includes a super fast Nginx cache by default, that you can turn on and off yourself. The default Nginx cache is often a simpler and faster alternative to most WordPress plugin, as the cache is managed by the server itself.
Managing the Cache is straight forward. To manage your cache, you should be logged in to your Hustly hosting admin panel. Once you are logged in, navigate to the concerned domain, switch to the “Hosting & DNS” tab and select the “Apache & Nginx Settings option.”
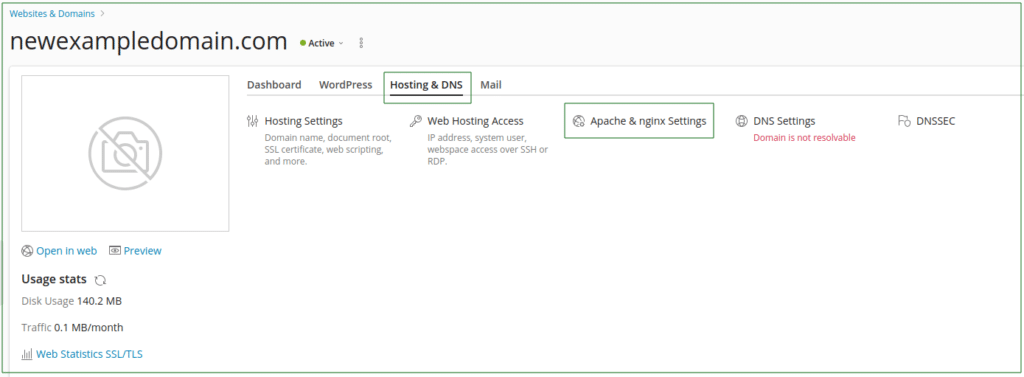
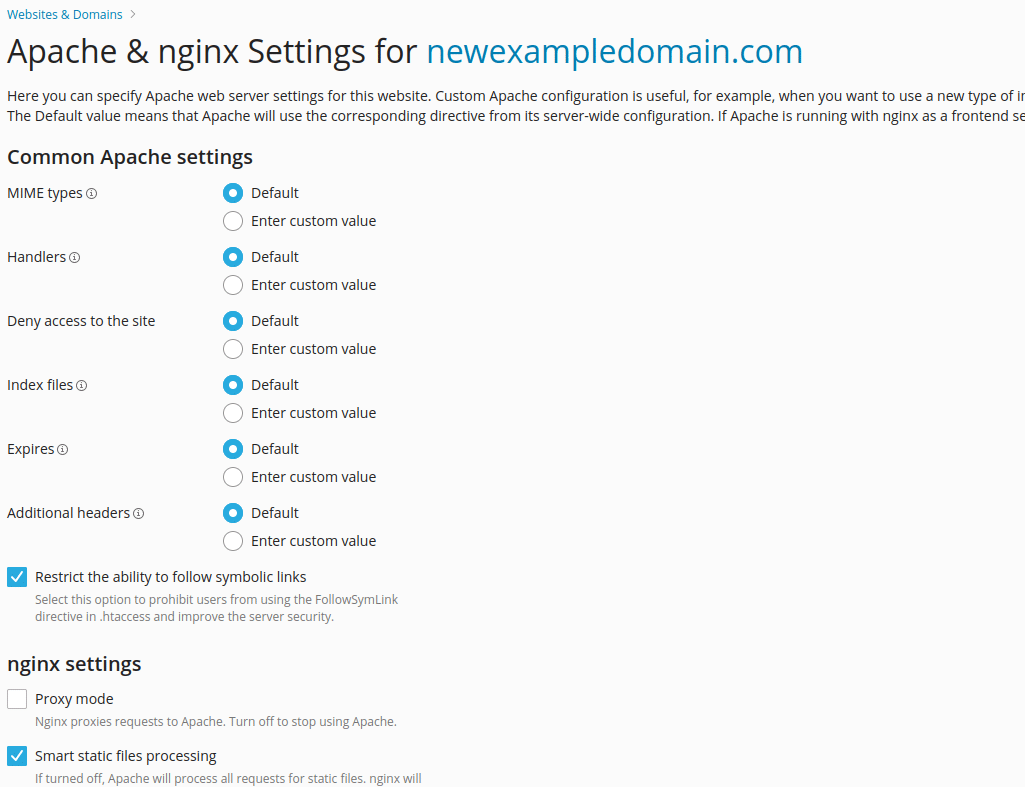
Ensure Nginx is being used as the server and not Apache
The Nginx cache system is available for websites hosted on an Nginx server. Ensure that “Proxy mode” is disabled under Nginx settings to ensure that Nginx is being used and not Apache.
Turn on Nginx Caching
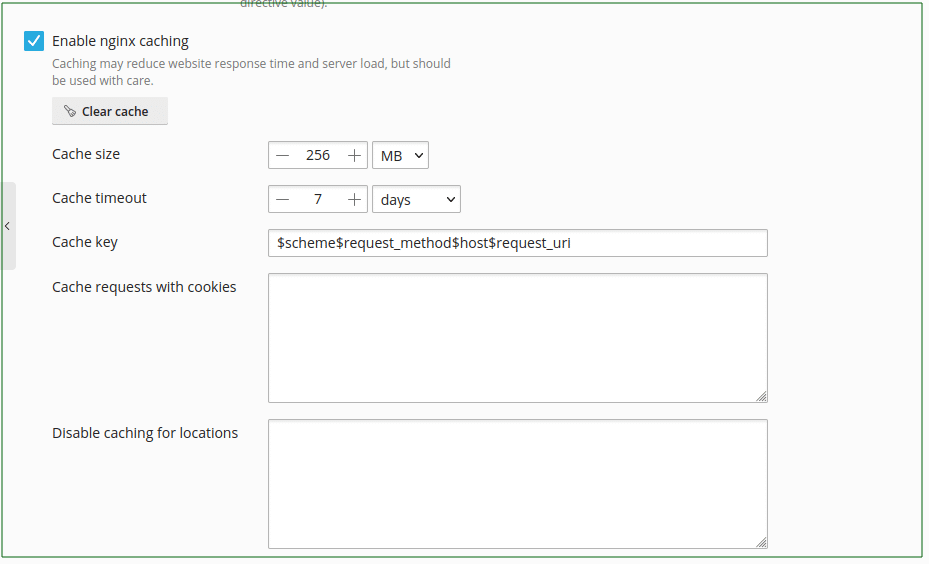
To turn on Nginx caching, enable “Nginx cache” as shown below. Set the Cache size to the amount of data you want to cache. We have allocated a liberal 256MB here, but for most websites a smaller size as little as 50MB should suffice. Set the Cache Timeout to a period that aligns with how often your website is updated. We have selected 7 days since this is a new website with limited traffic. On websites with high traffic, you would want a shorter cache timeout (usually a few seconds).
And that’s it – your super fast Nginx cache should not be enabled.
Clearing your Cache
As a website administrator, you will often need to purge your cache in order to see the latest changes on your website. To clear your cache, simple click the “Clear Cache” button.
Please always ensure that you hard-refresh your browser to view the latest updates on your website.
We hope you found this guide useful. Please let us know what you think in the comments section below.