This article is a guide for customers on Hustly managed WordPress hosting plans, who are using our default setup. Users with WordPress setups similar to ours will find this guide useful as well.
Please note that updating your Domain’s DNS and SSL settings will lead to your domain becoming unavailable temporarily.
If you are a Hustly customer and need assistance in making these changes, please create a support ticket to have your domains setup by us at no extra cost.
In order to configure your domain and install SSL certificates, you need to be logged into your hosting admin panel, ideally from a modern web browser on a desktop or laptop sized device.
Before you read this article, we assume that you have read and completed setting up the following:
- Creating and setting up your Hustly hosting account
- How to login to your hosting server’s admin panel
You will need to add our nameservers and IP to your domain name as a custom DNS also known as “custom nameservers” or Glue records.
Step 1: Changing your name server settings with your domain name registrar
Once you are logged in to your dashboard in the Hustly website management app, you can access both the IP address for your hosting server and your nameservers. Upon logging in, scroll down to the IP & NAMESERVERS section, to find your hosting server’s IP and Nameserver. Please note that if you have multiple domain names or websites, each domain would have their own IP & nameserver settings.
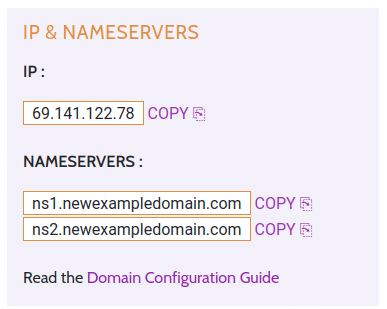
As you would notice in the image above, your custom nameservers will be of the format :
(i) ns1.<your domain name>
(ii) ns2.<your domain name>
With most domain name registrars, you will need to login to your domain registrar’s account.
To use your Hustly server as your primary DNS, you will need to add your domain’s nameservers as glue records to your domain registrar account. These records will have the format:
ns1.<your domain name> <your Hustly server IP>
ns2.<your domain name> <your Hustly server IP>
For example:
ns1.yourwebsite.com
ns2.yourwebsite.com
Once the glue records are setup, you will need to add “Nameservers” to your domain, and point these records to the nameservers above (ns1.yourwebsite.com and ns2.yourwebsite.com)
A detailed guide with specific tutorials and screenshots for popular domain name registrars such as GoDaddy and Namecheap, is published here by Plesk.
Step 2: Fine tune your DNS settings
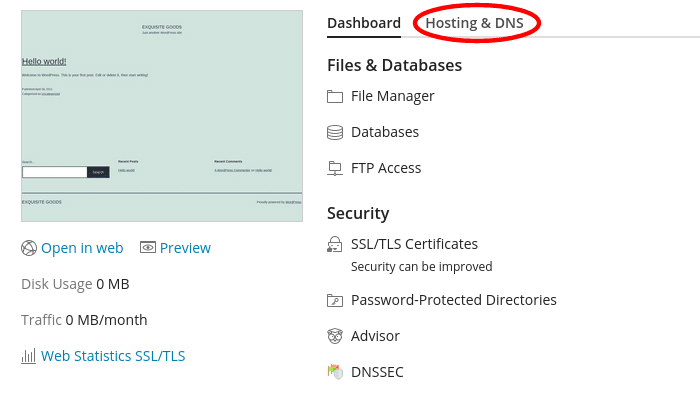
Find and click on the “Hosting & DNS” tab inside your hosting admin panel, if you need to configure additional DNS settings for emails, SMTP, subdomains and more.
Step 3: Issue new SSL certificates for the new Domain
Find and navigate to the SSL/TLS certificate option for your domain on your hosting admin panel.
Click on “Reissue Certificates”

Select the certificate you want, and complete the steps. Please note that you will need to scroll to the bottom and choose “Let’s Encrypt” for the Free option. The other SSL vendors will prompt you to pay for the certificate.
We hope you found this guide useful. If you have any questions, comments or feedback, please feel free to share your thoughts in the comments section below.