This article is a guide for customers who want to sign up for a Hustly WordPress hosting plan.
Creating a Hustly account is simple and straightforward. There are only 3 prerequisites that are required to setup your Hustly account.
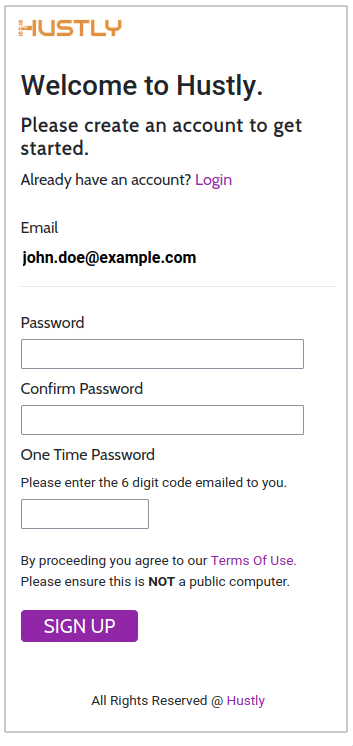
- A valid Email address: You must use a valid email address to sign-up. The sign-up process requires an email address, which would be validated through a One Time Password. Please do not use a throwaway or temporary email address as all future communications between you and Hustly are via email. Therefore, it is absolutely necessary that you use a valid Email address to sign-up, else you will never receive any support or system related notifications.
- A valid Payment method: A valid payment method is required to purchase a hosting account. At this moment, only credit and debit cards of known banks are supported. We are in the process of adding support for additional payment methods.
Step 1: Sign Up to create an account
To start the account creation process, sign up to create an account by visiting the Hustly Sign Up page. You will be asked for your email address. Alternatively, select the appropriate hosting plan you want from our hosting plans & pricing page and you will be automatically prompted to enter your email address.
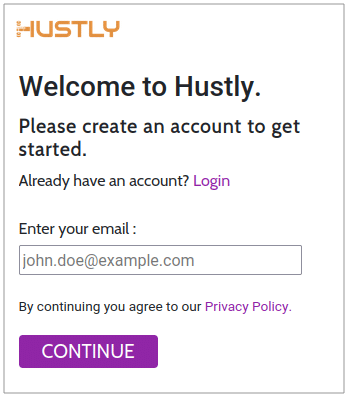
Enter a valid email and click continue. You will be prompted for a password and a one-time-password that would have been sent to the email address you provided.
Step 2: Select & purchase a hosting plan
Select the plan and the plan period you with to purchase. The Professional plan is great if you plan to host a single or up to 3 websites. If you want to host more than 3 websites, our Expert & Agency plans include unlimited websites and offer incredible value for money, with the unique ability to launch websites in multiple data centers from the same account. All plans are available in monthly, annual and 3-year payment plans.
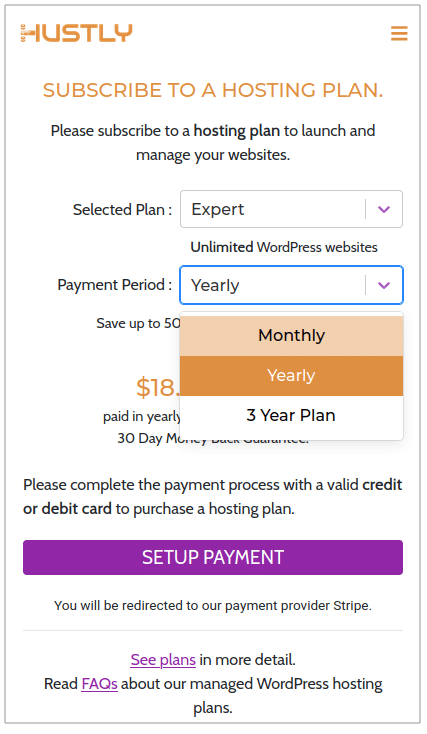
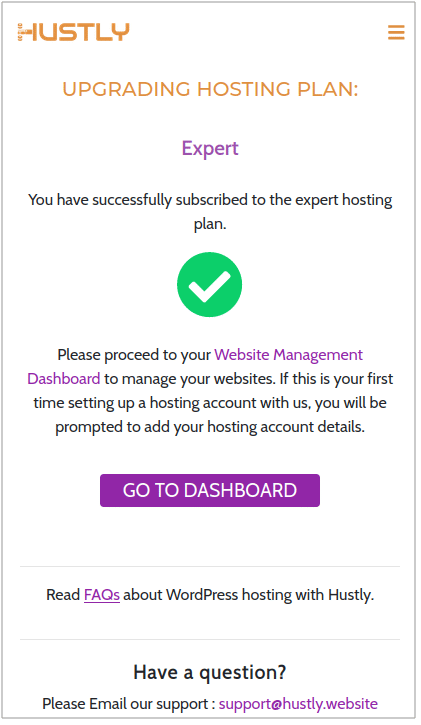
To purchase your hosting plan, click on “Setup Payment” and you will be directed to our payment provider. Complete the payment process by connecting a valid credit or debit card, and you will be redirected back to your account. If the payment setup was successful, you will see a success message. To launch your websites, proceed to the Website Management Dashboard by clicking the “Go To Dashboard” button.
Step 3: Setup your first hosting server account
You will be prompted to setup your Hosting account. Complete the form to setup your hosting account. The two things to keep in mind here are :
- Setup a Server Login Username: This is your system username on the server, and required to access various parts of your hosting environment, including the admin panel. Please choose a memorable username. You will require this username to login to your hosting server via the admin panel.
- Choose a location: Choose the location for your first website. This location is the data center where your first website will be hosted. At the moment, our data centers are located in North America, United Kingdom & Europe, with more location options coming soon. If you are on the Professional plan, you will only be able to choose 1 location during this step. On our Expert & Agency plan, you will be able to launch your websites in additional locations, that you can activate later once your first location is setup.
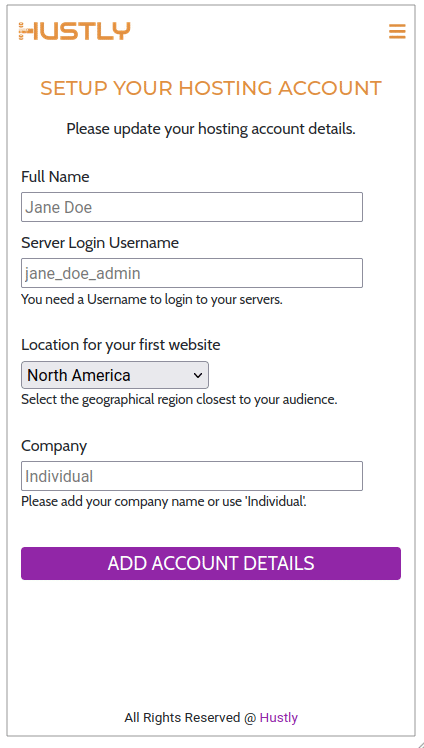
Add your account details, and wait for the application to reload. This step can take a few seconds, since in this step an real hosting server space with real resources, are created and allocated to your Hustly account.
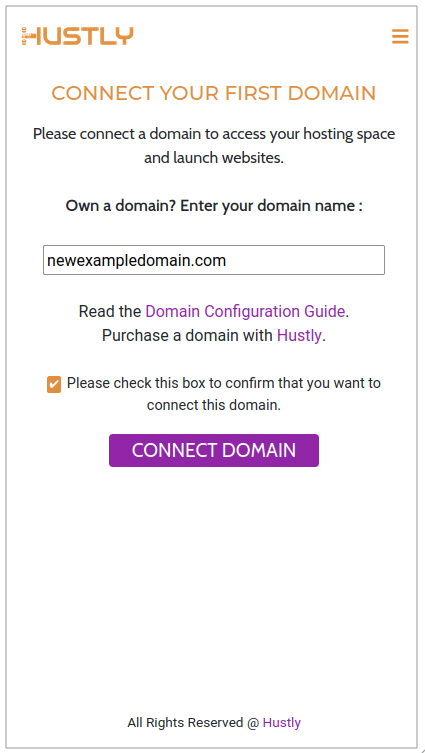
Step 4: Connect your first domain
Once the setup is complete, you will prompted to enter your domain name. This domain will be associated with your account. However, it is easy to change this domain at any point in the future. In case you do not have a domain ready, feel free to use a placeholder domain name, or reach out to our support to receive a temporary domain name.
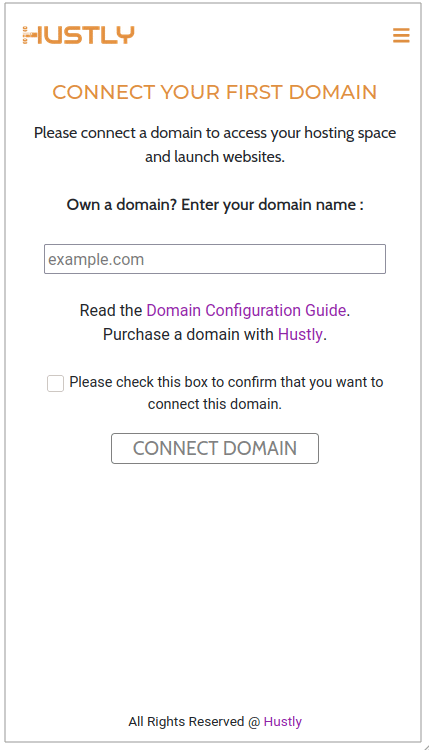
While you add your domain, please ensure to check the box, confirming that you wish to add this domain. Also, it is important to note that you should not add the ‘https://” prefix to your domain name, and there is n need to add the “www” either, unless you specifically want this domain to be a subdomain.
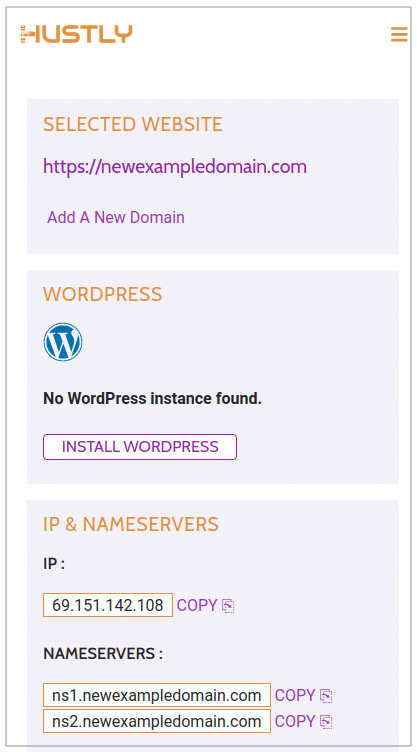
Please wait for the dashboard to reload, and you will be able to access your account’s website and domain management dashboard. From here, you will be able to manage the domain you have added, launch WordPress or other websites on it, access your server’s admin panel, as well as connect and launch new websites and domain names. Customers on the Expert & Agency plans will also be able to launch additional hosting servers in new locations, in addition to their first one.
Congratulations! Your Hustly account is now set up.
Next Steps.
Congratulations, your Hustly hosting account has now been setup. Please proceed to the next set of guides to learn to use the Hustly hosting environment.
Login to your Hosting server’s admin panel
Configuring and connecting your domain names with your Hustly hosting account