One of the unique advantages of hosting with Hustly is that you are able to host your websites in multiple locations without having to create new accounts. This is a feature unique to Hustly, and most hosts only let you host all your websites in the same location. This feature is ideal for power users, developers and agencies who often manage multiple websites for themselves or other clients. Low server ping times, increasing regulations around data protection, and client preferences to host their websites nearby – hosting a website in a continent where most of its audience is located, is essential.
Keeping this in mind, all Hustly users subscribed to our Expert, Agency & Custom plans are able to launch additional hosting servers in our data-centers located in different continents.
Before you start this tutorial, there are a few prerequisites:
- You have created and setup your Hustly hosting account
- You have configured your domain name with Hustly
- You know how to login to your hosting admin panel
You would also need to have a new domain name, that you wish to connect to your new Server.
Additionally, as mentioned earlier, only users subscribed to Expert, Agency & Custom plans (where applicable) are able to use this feature. If you are on a Professional plan or do not have a hosting plan with Hustly, you will need to upgrade or subscribe to our Expert or Agency plan.
So here are the steps to host a new website in a new server location:
Step 1: Login to your Hustly account
Login to your Hustly account. Once logged in, you should be able to see your existing domain names and hosting server details.
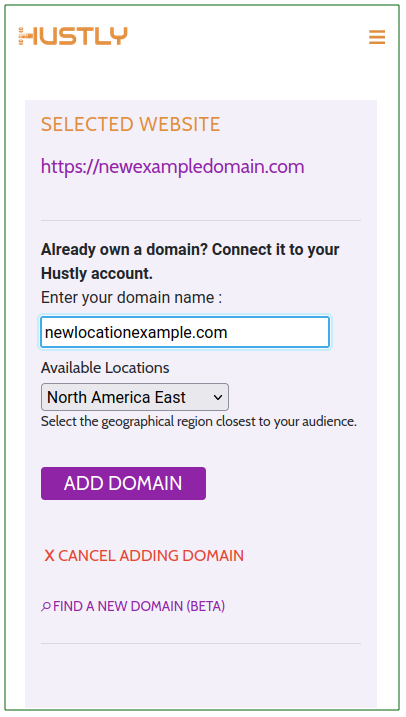
Step 2: Add a new domain
Select the “Add A New Domain” link, and add your new domain name, without the “https://” or “www” part.
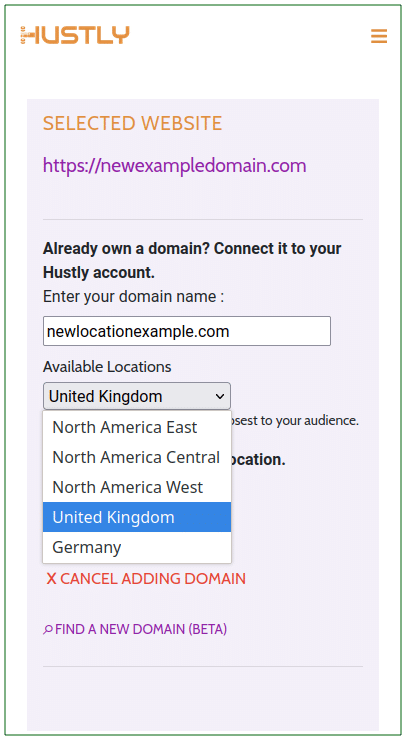
Step 3: Select your new location
Our domain was hosted in North America East. From the list of available servers, we will choose a different location for our new website. In this case, we will choose UK, but you can choose any of the locations. Please note that the list of available locations might change, depending on availability. Some times your desired location might not be available as we are constantly deploying new servers – please try again after some time or contact our support.
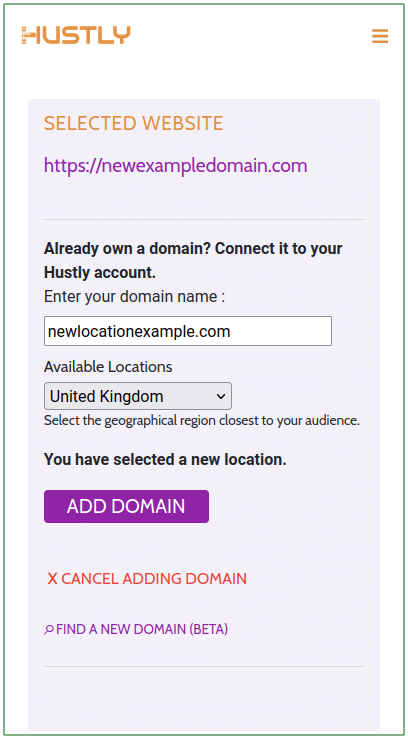
Since we have selected a new location, we will see it indicated on the dialog. Notice the message that says “You have selected a new location”, in the following dialog:
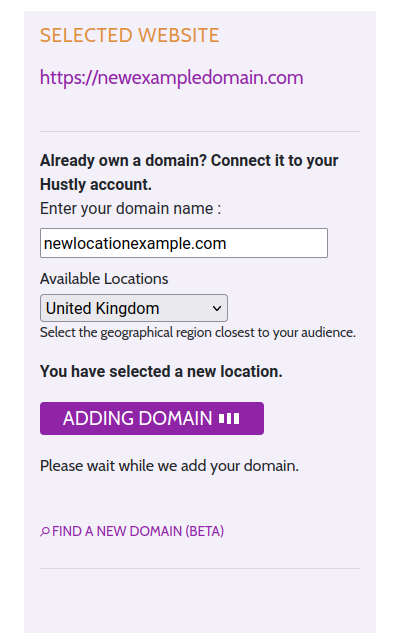
Step 4: Add your new domain
Once you confirm all the details are correct, select “ADD DOMAIN”, and wait for the process to complete.
Once the process finishes, you will see a success message as shown below and your dashboard will reload.
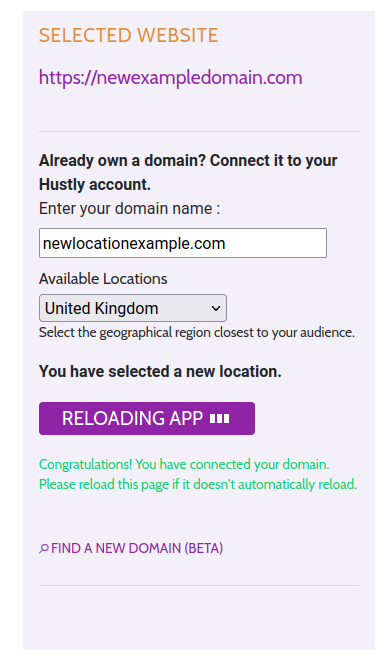
Don’t worry if the operation fails or the page simply reloads. This can happen if you were idle for too long. Simple reload the Hustly website management app, and if your new domain was not added, you can restart the process again.
Step 5: Verify the operation
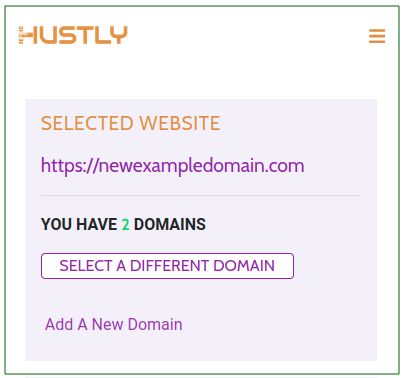
If the previous operation was successful, you would notice that you have an additional domain added to your account. Since we started with a single domain, we can now see an additional domain in our account. Note the message “You have 2 domains”.
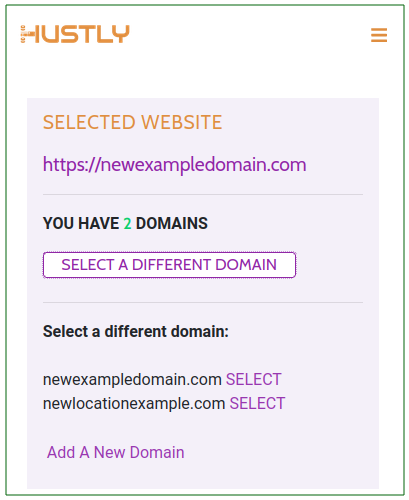
Click on “Select a different domain”, to view all your domains.
This will show all your domains in your account. Select the domain you just added, by pressing “SELECT” next to the appropriate domain name.
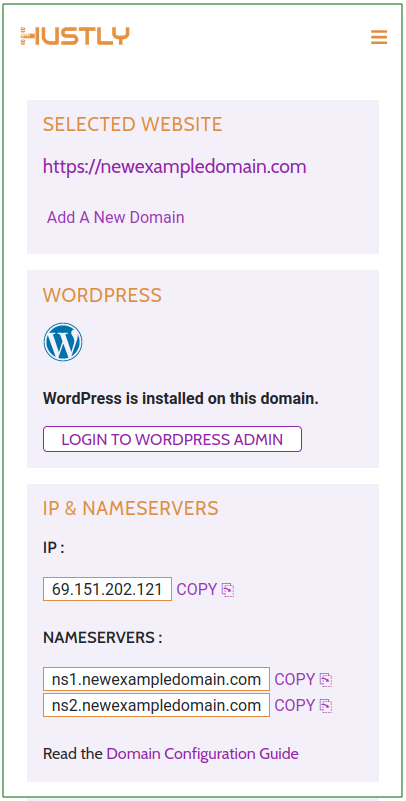
Once you select the appropriate domain, the respective server settings would load. Scroll down to the “IP & NAMESERVERS” section or the “HOSTING ADMIN PANEL” section, you would see the details of your the new server you just deployed.
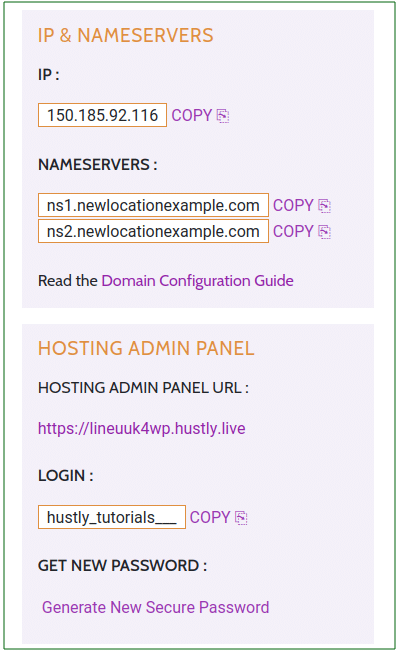
You confirm by switching between the domains that you indeed deployed the website to a new server. You will notice that the two servers have different IP addresses and the hosting admin panel URLs are different.
Congratulations! You activated your new server location.
You have now deployed websites in multiple servers from your Hustly account. We are one of the few hosts, that make this process so easy. And this is the magic of our Expert & Agency plans. Simply deploy your websites to wherever your customers are.
Signing in to your new server
Your newly deployed server is a fresh hosting environment, deployed for you. You can now deploy additional websites or domains in this location. You can either launch websites, install WordPress, connect a CDN or carry out basic operations from the Hustly app. For deeper control, you will have access to your new server via a hosting panel.
Since each of your servers are different, you will have different hosting panel accounts as well. Luckily, the Hustly app makes it easy to manage your credentials for your hosting panel. If you have not already, please checkout our previous guide on how to manage login and credentials for your hosting panel.
If you haven’t already, you will also find it helpful to read our guide on accessing your files on your hosting server via FTP or a file manager.
We hope you liked this tutorial. Please let us know in the comments section if you have any questions or comments.